info@grinpolish.com
+86 18098908025
Follow Us:


2026
Abrasive grit size is one of the most critical variables that decide your final surface quality, material removal rate, processing time and even production cost. Choosing improper grit will lead to deep scratches, low polishing efficiency, wasted consumables and rejected workpieces. From heavy stock removal in rough‑grinding stage all the way to flawless mirror finishing, each step calls for a matched grit grade. This guide walks you through grit classification, practical selection logic and common‑material reference for diamond powder, sandpaper, lapping film and polishing pads.
Grit size refers to the particle dimension of abrasive grains. Two main standards are widely used in global industrial procurement: FEPA (European standard) and ANSI (US standard). Lower grit numbers mean larger, coarser particles for fast cutting. Higher grit numbers represent finer particles for smoothing and final finishing.
Important reminder: Do not mix standards. A FEPA P1200 grit is not identical to ANSI 1200 grit. Always confirm the standard with your polishing‑consumable supplier during bulk purchasing.
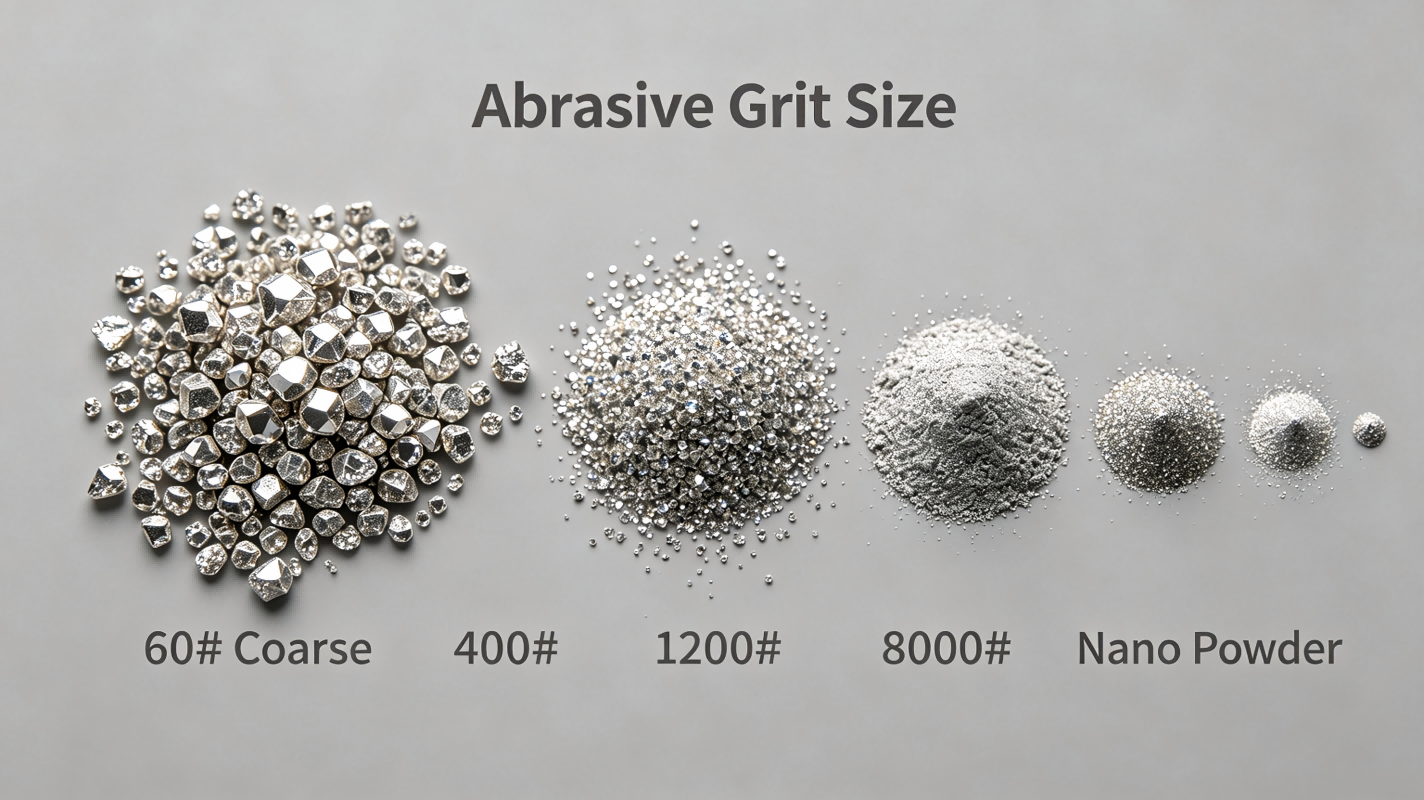
1. Rough‑Grinding Stage: Fast Material Removal
Grit range: 60# – 400#
Core goal: Remove big burrs, welding seams, surface defects, heavy stock allowance. Prioritize high cutting capacity over surface smoothness.
•Typical application: flatten uneven blanks, remove casting scale, heavy burr elimination.
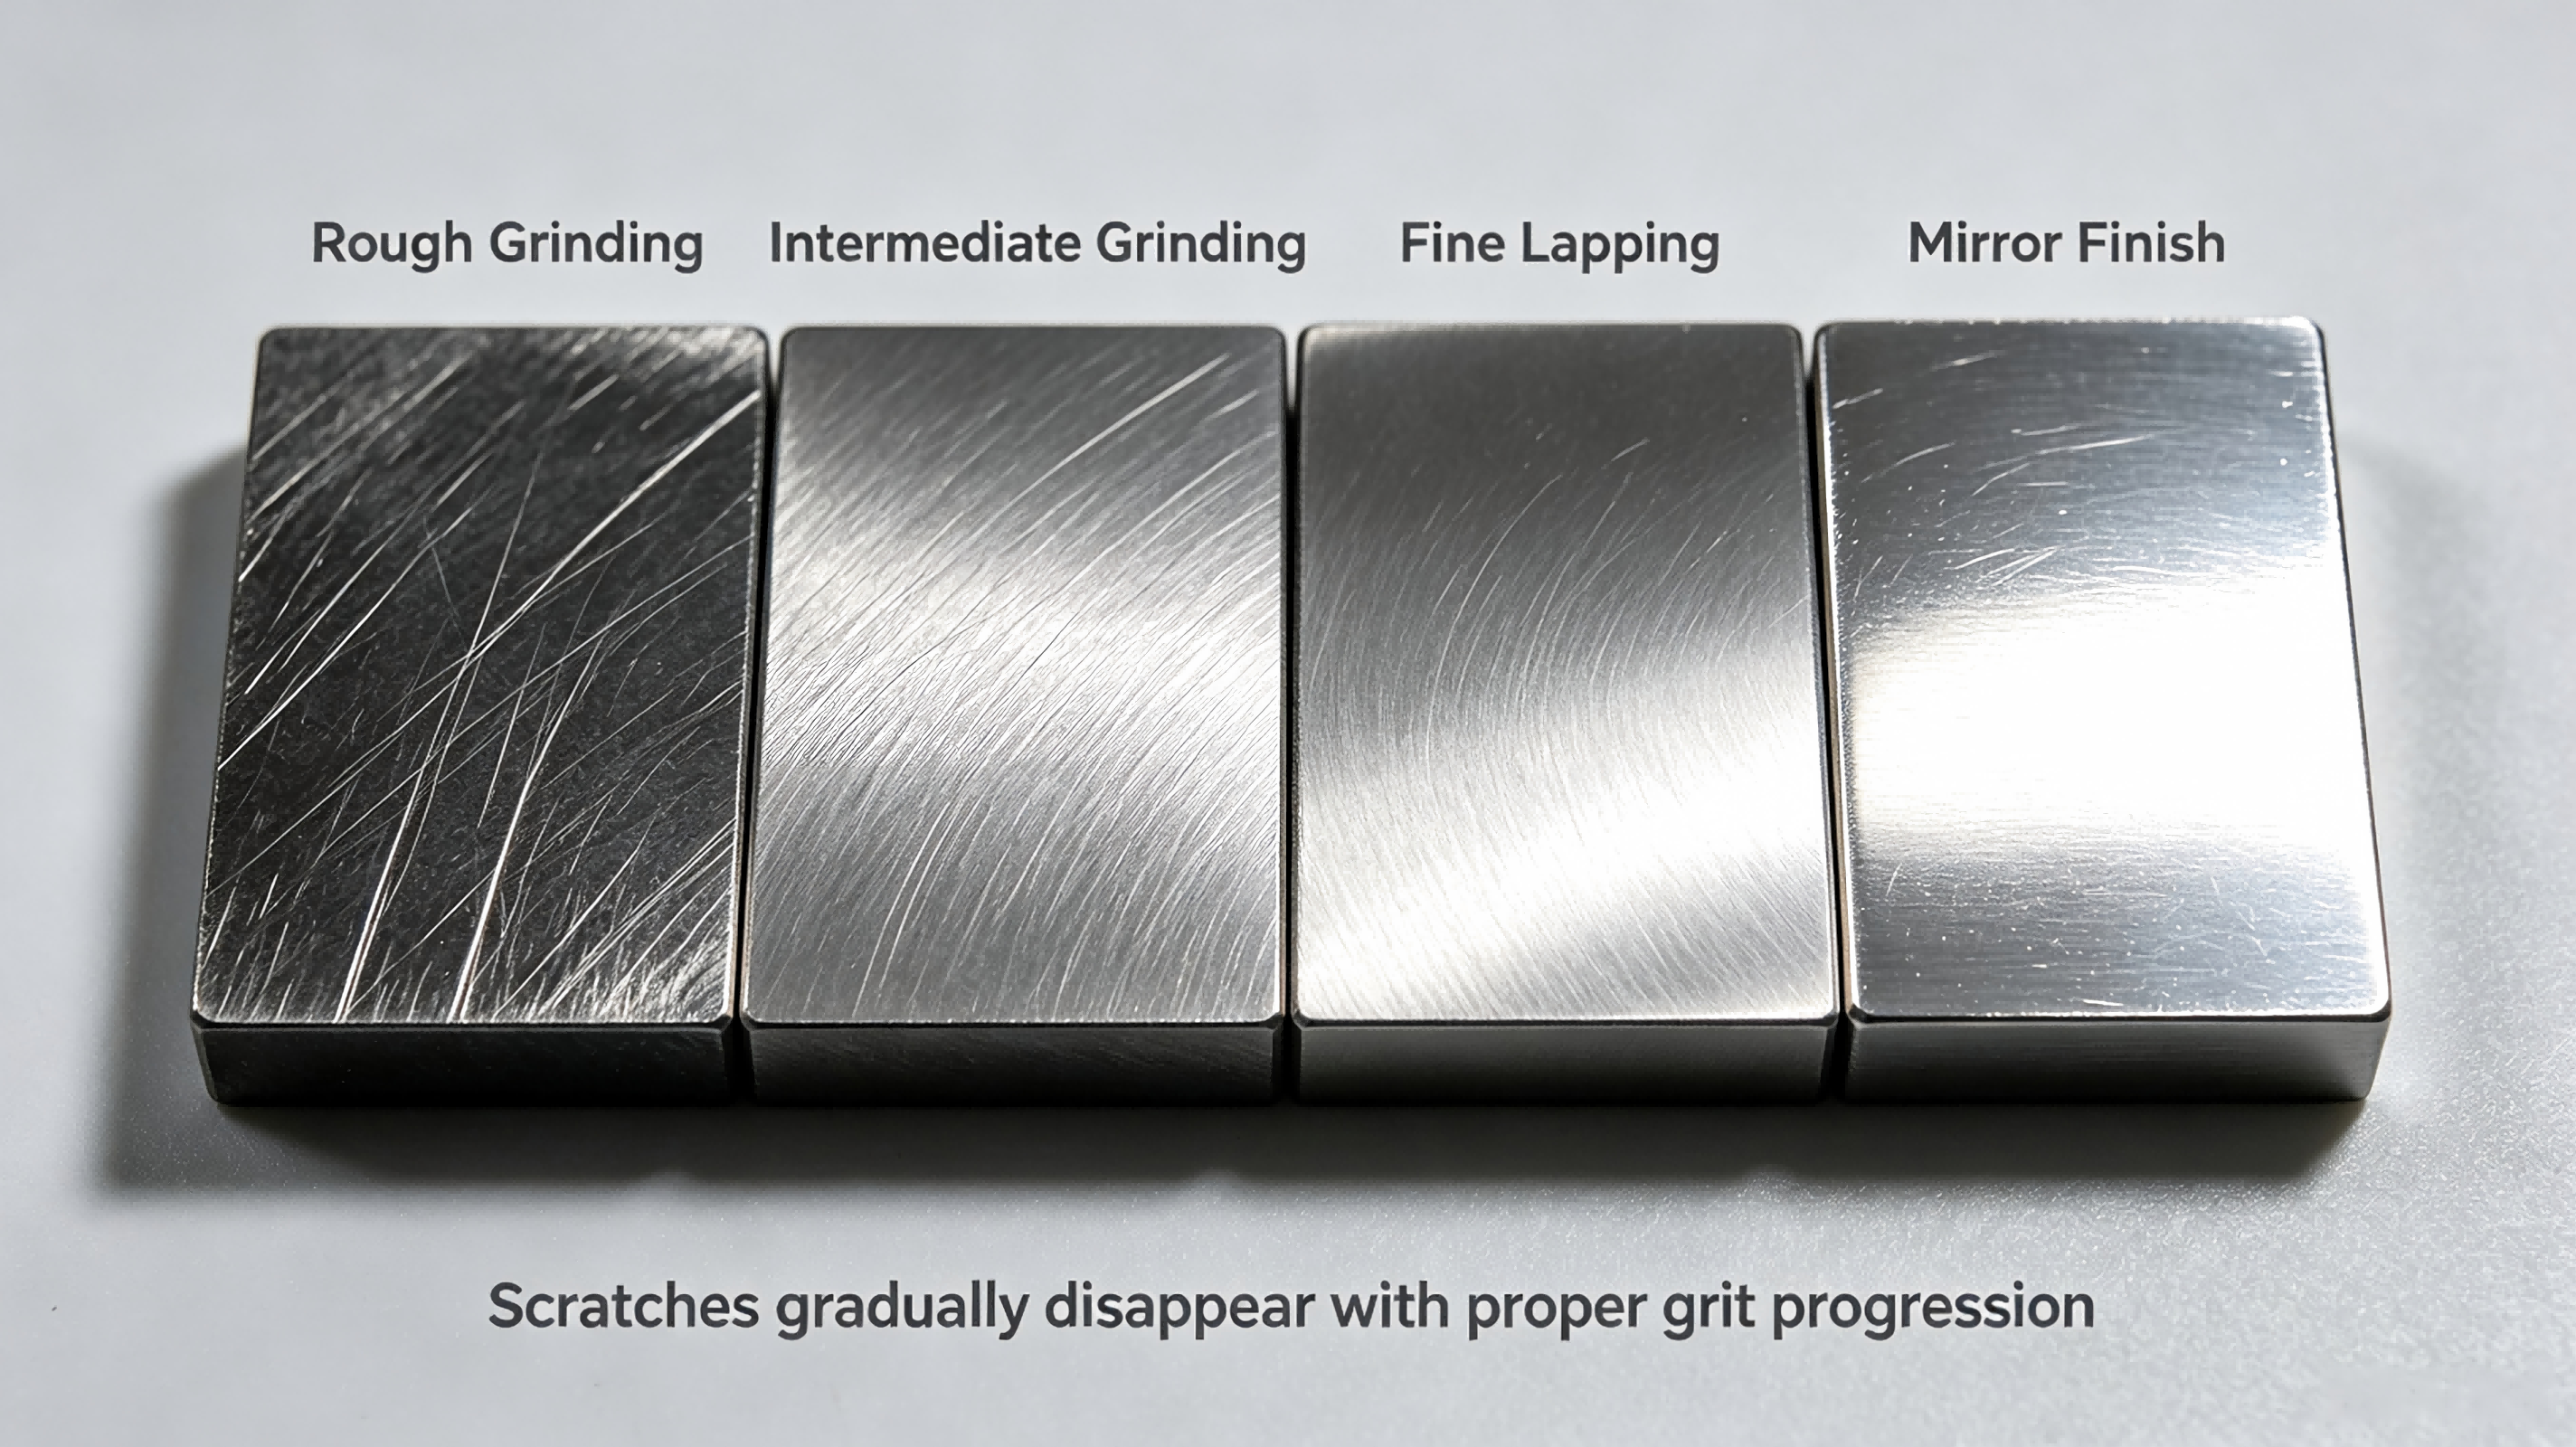
•Notes: Coarse grit leaves deep surface scratches. Never skip intermediate grinding, or those deep marks cannot be erased in later fine‑polish steps.
•Recommended products: Coarse diamond sandpaper, resin‑bond diamond grinding discs, coarse silicon‑carbide abrasives.
2. Intermediate Grinding Stage: Remove Rough‑Grinding Scratches
Grit range: 600# – 1200#
Core goal: Eliminate deep scratches created by previous coarse abrasives, create uniform pre‑finish surface and lay foundation for fine lapping.
•Notes: Do not jump grit sizes in large gaps. Skipping from 400# directly to 1500# will lock residual scratches under the new surface. Step‑up grit transition is essential.
•Recommended products: Diamond lapping film, aluminum‑oxide sandpaper, medium‑grade diamond micro‑powder.
3. Fine Lapping & Pre‑Finishing Stage
Grit range: 1500# – 8000#
Core goal: Gradually reduce surface roughness Ra value, eliminate visible machining lines. At this stage, material removal becomes low; surface quality is the priority.
•Typical workpieces: hard‑alloy parts, optical blanks, ceramic components, precision metal fittings.
•Notes: Keep polishing environment clean. Coarse dust mixed into slurry or pads will introduce new random scratches.
4. Mirror Finishing Stage: Ultra‑Fine Polishing
Grit / Particle range: 10000# up to nano‑grade diamond powder (0.1‑3 μm)
Core goal: Achieve mirror‑like, scratch‑free surface with ultra‑low Ra. Almost no visible material removal.
•Typical application: sapphire substrate, optical glass, tungsten‑carbide moulds, medical‑grade titanium alloy parts.
•Notes: Mirror finish relies not only on ultra‑fine grit, but also matched polishing pads, polishing slurry and stable processing pressure. Even tiny impurity can ruin mirror surfaces.
1. Hard brittle materials (tungsten carbide, ceramics, sapphire)
Rough: 200#‑400# → Intermediate: 800#‑1500# → Fine lapping: 3000#‑8000# → Mirror finish: 10000# ~ 1μm nano diamond powder.
Diamond‑based consumables are strongly recommended for high‑hardness workpieces.
2. Stainless steel & general metal parts
Rough: 120#‑320# → Intermediate: 600#‑1000# → Fine finish: 2000#‑5000#.
Mirror‑grade metal surfaces usually end at 5000#‑8000#.
3. Optical glass & lens blanks
Skip very coarse grit. Start from 1200#, go step‑by‑step to 5000#, then switch to sub‑micron diamond powder for final mirror polishing.
1. Avoid large grit jumps. Increase grit gradually. A safe rule: do not increase grit more than 2‑3 times of your current grit value.
2. Fully remove all scratches from the previous grit before moving to the next finer grade. Residual scratches cannot be polished away by finer abrasives.
3. Separate consumables for different grit grades. Never reuse coarse‑grit pads or films for fine mirror polishing. Cross‑contamination is a top cause of unexpected scratches.
4. Distinguish dry polishing and wet polishing. Wet lapping can extend abrasive service life and reduce surface damage for fine‑grit processes.
Q: Can I use very fine grit directly to skip rough grinding and save time?
No. If your workpiece has heavy surface allowance or deep defects, fine grit will wear rapidly with extremely low removal rate. It raises your total cost and wastes production time.
Q: Higher grit number always means better polishing result?
Not exactly. Over‑fine grit for your target requirement only brings longer processing cycle and higher consumable cost. Match grit to your target Ra value, not blindly pursue highest grit.
Grit‑size selection balances removal efficiency, surface roughness target, workpiece material and production cost. For mass‑production factories, standardized grit transition sequences can greatly stabilise finished‑product yield. If you are struggling to confirm the optimal grit combination for your specific workpiece, our technical team can provide custom‑made abrasive and process suggestions for your project.
Need custom grit‑grade diamond micro‑powder, lapping film or polishing pads? Contact our engineers today to get your tailored polishing solution, or download our full product catalogue for detailed grit specification sheets.